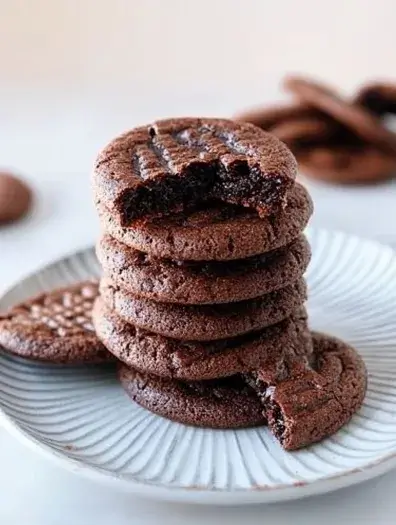
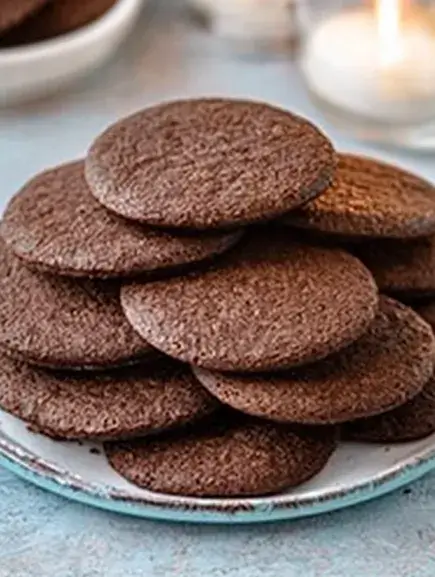
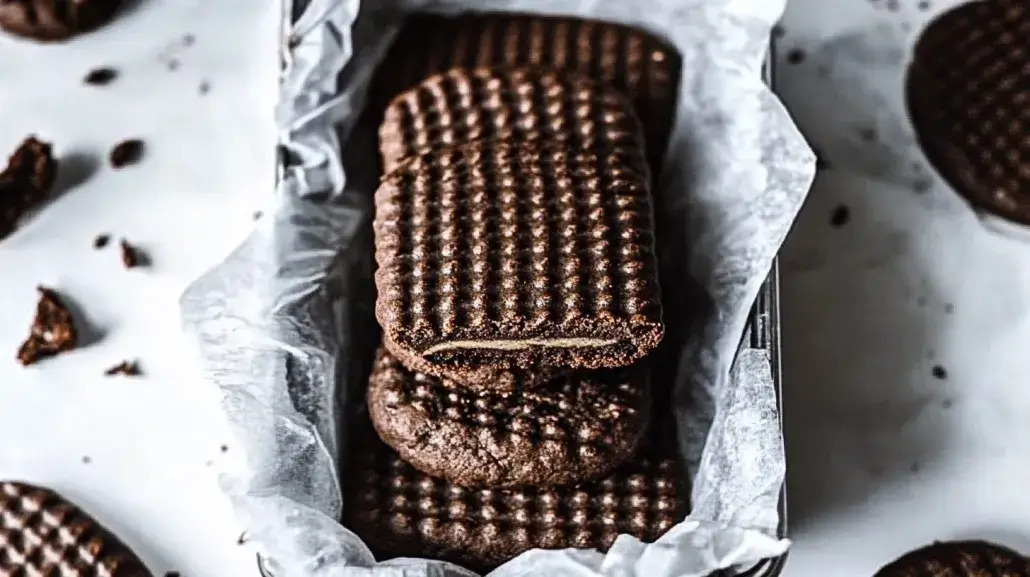
Indulge in the irresistible charm of homemade chocolate wafer cookies. They offer a perfect balance of crispiness and sweetness. Discover the joy of crafting these classic treats in your own kitchen. Savor the satisfaction of a delectable homemade confection that surpasses store-bought options.
Chocolate wafer cookies have long been a beloved staple. They are treasured for their delightful texture and rich chocolate flavor. By taking the time to prepare them at home, you’ll unlock a world of culinary delight. You can customize the recipe to suit your personal preferences. Elevate your baking skills and impress your loved ones with these homemade marvels.
Table of Contents
Key Takeaways
- Homemade chocolate wafer cookies offer a superior crispy texture and intense chocolate flavor compared to store-bought options.
- Baking these cookies at home allows for customization and personal touch, creating a truly unique experience.
- The satisfaction of crafting these classic treats from scratch is unparalleled, making them a rewarding baking project.
- Homemade chocolate wafer cookies can be enjoyed as a standalone treat or incorporated into various desserts and recipes.
- With the right technique and attention to detail, you can achieve bakery-quality chocolate wafer cookies in your own kitchen.
Introduction to Classic Chocolate Wafer Cookies
Chocolate wafer cookies have a long history, starting in the early 1900s. They began as simple, crisp cookies, perfect with tea or coffee. The addition of chocolate made them the favorite treat we love today.
Brief History of Wafer Cookies
Wafer cookies have been around for ages, with roots in ancient times. They were thin and crisp, used to carry flavors and fillings. The late 1800s and early 1900s saw the introduction of chocolate, creating the classic wafer cookie we know.
Why Homemade Beats Store-Bought
Homemade chocolate wafer cookies can’t be beat by store-bought ones. Making them at home lets you choose the best ingredients for a richer taste. You can also make them your own by trying different chocolates or adding special touches. Baking and sharing homemade cookies is a joy.

Essential Ingredients for Perfect Chocolate Wafer Cookies
Creating delicious chocolate wafer cookies starts with the right ingredients. You need the best cocoa powder and the right mix of butter and sweeteners. Each part is crucial for a cookie that’s crispy yet sweet. Let’s look at what you need to make perfect homemade chocolate wafer cookies.
Flour Power
Your cookies begin with quality all-purpose flour. Choose flour with 10-12% protein. This helps your cookies stay just right, not too dense or dry.
Cocoa Connoisseur
The main ingredient is the cocoa powder. Use high-quality, Dutch-processed cocoa powder for the best chocolate taste. Don’t go for natural unsweetened cocoa, as it can taste bitter.
Sweetener Showdown: Butter vs. Margarine
You can pick between butter and margarine for the fat. Butter adds a richer taste, while margarine makes the cookies crisper. Choose high-quality, unsalted butter or margarine, based on what you like best.
Sugar & Spice
Granulated sugar is the top choice for sweetness in chocolate wafer cookies. You can also try brown sugar or mix both for a richer taste.
With these key ingredients, you’re ready to bake delicious homemade chocolate wafer cookies. They’ll make your taste buds happy.
Kitchen Tools and Equipment Needed
Baking homemade chocolate wafer cookies needs some basic tools and equipment. You can make great cookies with simple kitchen items. But, using professional-grade baking tools can make your cookies better and more fun to make.
Must-Have Baking Tools
- Mixing bowls: Sturdy, wide bowls are ideal for combining ingredients and kneading dough.
- Baking sheets: Heavy-duty, rimmed baking sheets are a must for evenly baking the cookies.
- Wooden spoon or spatula: For mixing the dough and transferring the cookies to the baking sheet.
- Measuring cups and spoons: Accurately measuring ingredients is key to consistent results.
- Rolling pin: A smooth, even rolling pin makes it easy to roll out the dough to the perfect thickness.
Optional Equipment for Professional Results
While not strictly necessary, the following baking tools can help you achieve bakery-quality chocolate wafer cookies:
- Stand mixer: A powerful stand mixer with a paddle attachment can efficiently mix the dough, saving you time and effort.
- Food processor: Quickly and evenly chop the chocolate or nuts for mix-ins.
- Cookie scoops: These handy tools ensure uniform cookie sizes for even baking.
- Silicone baking mats: Prevent sticking and promote even browning on your baking sheets.
Cookie Cutting Options
When it comes to shaping your chocolate wafer cookies, you have several options. Traditional cookie cutters in a variety of shapes and sizes are a popular choice. Alternatively, you can use improvised tools like a sharp knife or a pizza cutter to cut the dough into rectangular or square shapes. For a truly unique touch, consider using cookie cutters in fun, creative designs to add a personal flair to your homemade treats.
| Baking Tool | Purpose | Recommended for Chocolate Wafer Cookies? |
|---|---|---|
| Stand Mixer | Effortlessly mixes and kneads dough | Yes |
| Food Processor | Finely chops chocolate and nuts | Yes |
| Cookie Scoops | Ensures consistent cookie sizes | Yes |
| Silicone Baking Mats | Prevents sticking and promotes even browning | Yes |
Step-by-Step Mixing Process
Making the perfect chocolate wafer cookie dough is all about the mixing. Follow these steps to get your cookie batter just right. This will make your cookies crispy and delicious.
- Start by creaming the butter and sugar until it’s light and fluffy. This step adds air to the dough. It helps your cookies rise and get crunchy.
- Then, add the eggs one at a time. Make sure to mix each egg fully before adding the next. This makes the dough smooth and even.
- Next, sift the dry ingredients like flour, cocoa powder, and baking soda into the mix. Fold them in gently. Don’t overmix, or your cookies might turn out tough.
- Finally, mix in the chocolate wafer cookies dough until it’s just combined. Don’t overdo it. This keeps your cookies soft and chewy.
By following these steps, you’ll get a dough that’s easy to work with. It’s ready to be shaped, cut, and baked to perfection.

“Proper mixing is the foundation of a great chocolate wafer cookie. Take your time and follow these steps for the best results.”
| Mixing Step | Purpose | Tips |
|---|---|---|
| Cream butter and sugar | Incorporates air into the dough | Beat until light and fluffy |
| Add eggs one at a time | Emulsifies the dough | Fully incorporate each egg before adding the next |
| Fold in dry ingredients | Combines the wet and dry components | Gently fold, avoid overmixing |
| Incorporate chocolate wafer cookie dough | Adds flavor and texture | Fold in until just combined |
Tips for Rolling and Cutting the Dough
Getting the right texture for your homemade chocolate wafer cookies starts with rolling and cutting the dough right. Here are some tips to help you make rolling cookie dough that turns into crisp, uniform cookies every time.
Achieving the Perfect Thickness
To get the right cookie dough thickness, roll it out evenly to about 1/4 inch. Use a rolling pin and a lightly floured surface to roll the dough gently. Make sure to apply even pressure all over to get a consistent thickness for even baking.
- Use a ruler or thickness guides to maintain the ideal cookie dough thickness.
- Roll the dough between two sheets of parchment paper to prevent sticking.
- Chill the dough for 30 minutes before rolling to make it easier to work with.
Preventing Dough Sticking
To avoid the hassle of prevent dough sticking, remember these tips when rolling and cutting your chocolate wafer cookie dough:
- Flour your work surface and rolling pin well to keep the dough from sticking.
- Gently lift and rotate the dough as you roll to prevent sticking.
- Use sharp, lightly floured cookie cutters to cut shapes cleanly without distorting the dough.
- Carefully transfer cut-out cookies to a parchment-lined baking sheet using a spatula or bench scraper.
| Technique | Benefit |
|---|---|
| Chill the dough before rolling | Helps maintain the cookie dough thickness and prevent sticking |
| Use a lightly floured rolling pin | Creates a barrier to prevent dough sticking |
| Rotate the dough as you roll | Ensures even rolling cookie dough thickness |
By following these tips, you’ll get the perfectcookie dough thickness and avoid any sticking issues. This will result in beautifully uniform chocolate wafer cookies.
Baking Temperature and Timing Guide
Baking the perfect homemade chocolate wafer cookies requires the right temperature and timing. The perfect mix of heat and time turns simple ingredients into a crispy treat. Let’s explore the best baking parameters for perfect wafer cookies every time.
The ideal baking temperature is between 350°F (175°C) and 375°F (190°C). This range helps the cookies get a crisp outside and a soft inside. For a conventional oven, aim for 375°F (190°C).
The baking time depends on the cookie dough’s thickness. Thinner cookies bake for 8 to 12 minutes. Thicker ones need 12 to 15 minutes. Watch them closely in the last few minutes to avoid over-baking.
Remember, oven temperatures can differ. Always keep an eye on your cookies and adjust the time if needed. Look for a golden-brown color and a slight puff in the center for perfection.
By following these tips for baking chocolate wafer cookies, cookie baking temperature, and perfect baking time for wafer cookies, you’ll make delicious homemade cookies. They will surely please your taste buds.
Achieving the Perfect Crispy Texture
Getting your homemade chocolate wafer cookies just right is key. You want that perfect crunch. Let’s explore how to get it right and fix common texture problems.
Common Texture Problems and Solutions
Many bakers struggle with cookies that are too soft or chewy. This can happen for several reasons. Maybe you mixed the dough too much, used the wrong ingredients, or baked at the wrong temperature. Here are some tips to fix this and get your cookies crispy:
- Make sure your dry and wet ingredients are in the right balance. Too much moisture can make cookies soft.
- Don’t overwork the dough. This can make it chewy because of the gluten.
- Bake at a higher temperature, like 375°F. This helps dry out the cookies faster.
- Try different baking times. Overbaking can make cookies too hard.
Storage Tips for Maintaining Crispiness
Storing your cookies right is crucial to keep them crispy. Here’s how:
- Let the cookies cool down completely before storing them in a sealed container.
- Don’t store them in the fridge. The cold can make them soft. Keep them in a cool, dry spot instead.
- If cookies start to lose their crisp, try putting a slice of bread or a paper towel in the container. It can soak up moisture.
- For longer storage, freeze them in a sealed container or bag. This keeps them crispy for weeks or months.
By using these tips, you can fix any texture problems and enjoy crispy, delicious homemade chocolate wafer cookies every time.
Creative Variations and Flavor Additions
Make your homemade chocolate wafer cookies even better by trying new things. Add your own twist to the classic recipe. This way, you can make them truly special and match your taste.
Try mixing in mint chocolate for a refreshing taste. The cool mint goes well with the deep chocolate. Or, go for orange chocolate wafer cookies for a burst of citrus flavor.
Feel free to experiment with flavored wafer cookies and add-ins. Add some toasted nuts like almonds or pecans for a nice crunch. You can also add a bit of cinnamon or sea salt to deepen the chocolate taste. The choices are endless when you personalize your cookies.
FAQ
What is the history of wafer cookies?
Wafer cookies have a rich history. They first appeared in the Middle Ages as thin, crisp wafers. Over time, they evolved into the chocolate wafer cookies we love today.
Why are homemade chocolate wafer cookies better than store-bought?
Homemade cookies offer many benefits. You control the ingredients for better taste and texture. Plus, they stay crispy, unlike store-bought ones.
What are the essential ingredients for perfect chocolate wafer cookies?
To make great cookies, use quality cocoa powder, flour, butter, sugar, and a bit of salt. Choosing the right ingredients and mixing them well is key.
What kitchen tools and equipment are needed to make chocolate wafer cookies?
You’ll need a mixing bowl, a mixer, a rolling pin, and cookie cutters. A food processor or marble slab can also help.
How do I properly mix the chocolate wafer cookie dough?
Mixing the dough right is important. Cream the butter and sugar first. Then, add dry ingredients slowly to avoid over-mixing. The dough should be smooth and ready to roll.
How do I roll and cut the chocolate wafer cookie dough?
Roll the dough to 1/8 to 1/4 inch thickness. Use a floured surface or parchment paper to prevent sticking. Use sharp cutters or a knife for clean edges.
What is the ideal baking temperature and timing for chocolate wafer cookies?
Bake at 350°F (177°C) for 8 to 12 minutes. Watch them closely to avoid overbaking. They should be lightly golden and firm.
How can I achieve the perfect crispy texture in my chocolate wafer cookies?
For a crispy texture, use the right ingredients and baking temperature. Adjust baking time if needed. Store them in an airtight container to keep them crispy.
What creative variations and flavor additions can I try with chocolate wafer cookies?
You can try many variations. Use different chocolates or add mint, orange zest, nuts, or spices. These can give your cookies a unique twist.

2 thoughts on “Best Chocolate Wafer Cookies in 20 minutes:”